Monday 22 September 2014

How the ADRC Shield was Developed

I am new to the Arduino community and have only done two simple projects so far using an Arduino Uno. I really like the way Arduino makes electronics so easy and opens it up to a wide range of people with varying abilities.

One thing I have been looking for is a way of making really stunning graphical user interfaces for my future Arduino projects. About 4 months ago I convinced the management to turn some of Xped's high tech into a Shield. And 2 months later we had the first prototype boards ready for alpha testing.

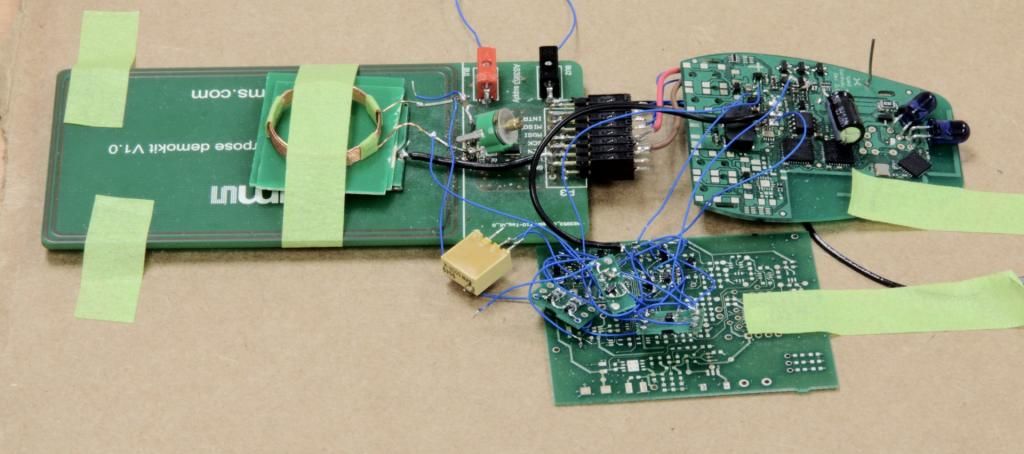
Here is a picture of how the project began. The board on the top left is an NFC development board we bought. The other 2 boards are in house boards we made for various other projects.


We wired together the parts of each board that we needed to get the features we were looking for. Here is a list of the main functions we came up with for the shield:
  • Near Field Communications or NFC for short. This is the same technology behind wireless payments and is also known as PayWave and PayPass. NFC is a feature on many smartphones.
  • Personal Area Networking or PAN for short using the 802.15.4 MAC layer communications protocol. This kind of PAN provides much greater range than Bluetooth.
  • A hashing chip for participating in secure operations such as over-the-air firmware upgrades.
  • An STM32F103R8 ARM Cortex M3 32-bit microcontroller.
  • 256 KB of external FLASH memory.
  • File system for storing data and other files.
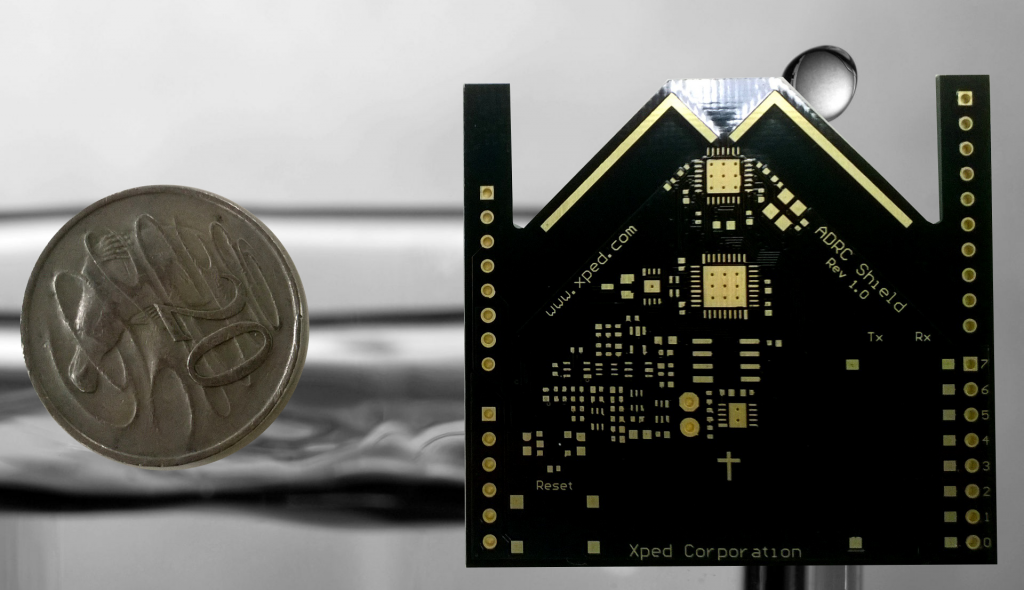
After working with this mess for around 2-3 weeks we had enough of the firmware and hardware verification done to move on to designing a custom board for the shield. Here is a picture of the very first shield board in its unloaded state.


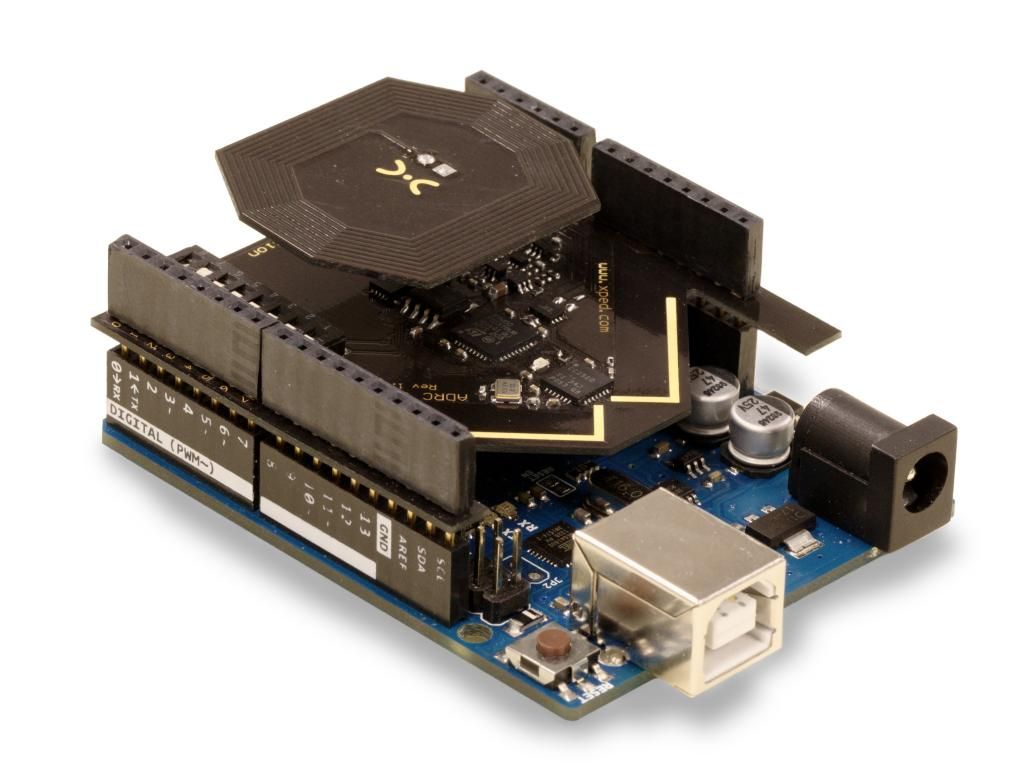
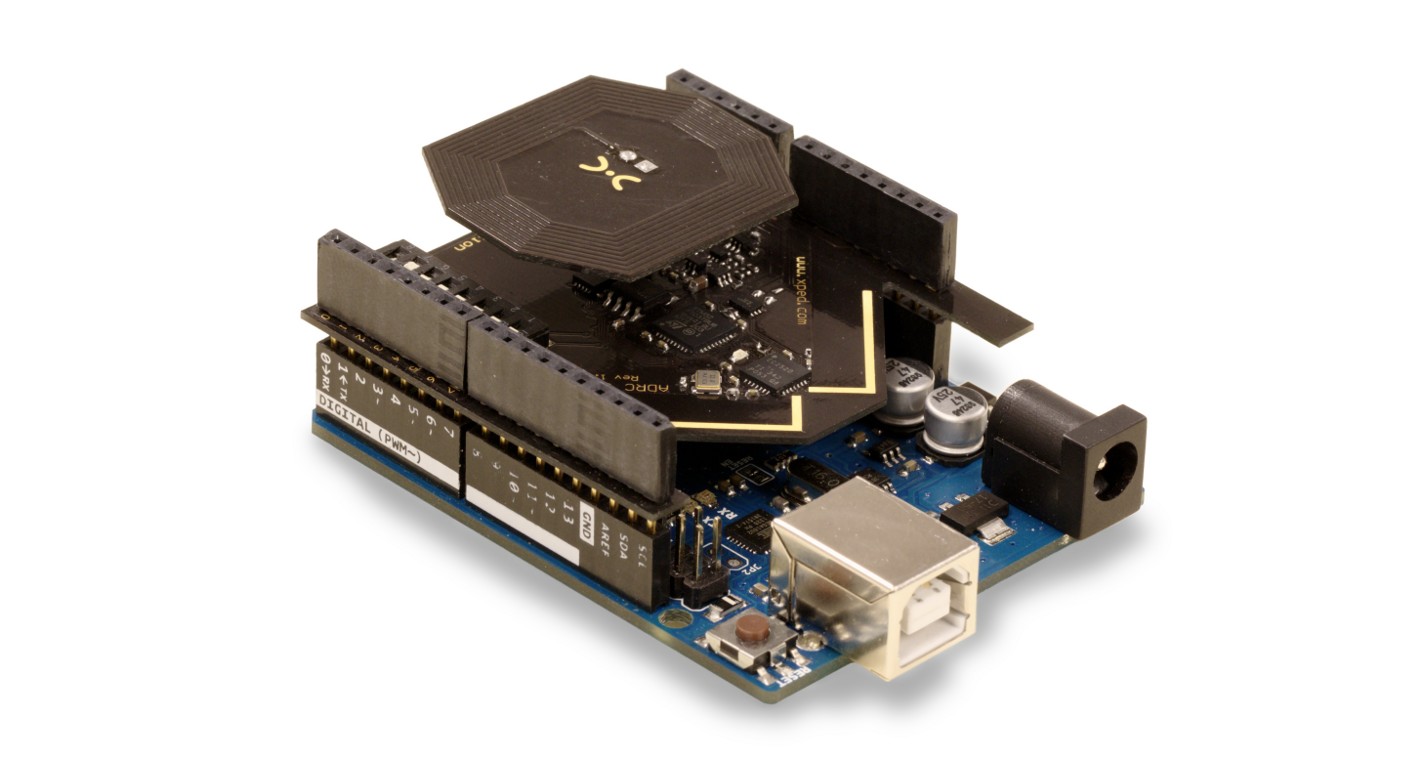
And not long after this we had a fully loaded and working shield. Here it is stacked on an Arduino Uno.

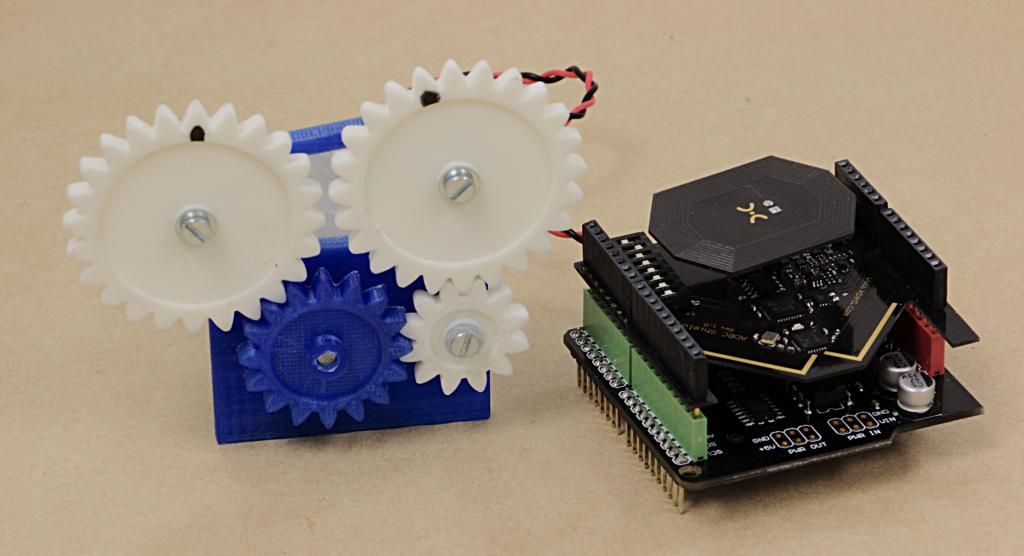
So currently we are writing a library for the shield that will make it really easy to use.  Here is the first demo project we made with it. In this project the shield is stacked on an off the shelf motor control shield which connects to a small DC motor which drives some plastic gears we made on a 3D printer.


When the device browser is not running, tap a smartphone to a device and its webpage will open in the web browser. The phone's NFC feature is used.


This video shows how easy it is to pair a new device with a smartphone. With the device browser running tap the phone to a device. The phone's NFC feature is used.


The ADRC system allows you to setup rules so that devices can interact with each other to perform useful functions. This is sometimes referred to as M2M.


You can use more than one controller and controllers can be of different types. The display of all controllers will be kept in sync. This video shows three controllers all controlling the same device. One of the controllers is a soft-controller running on a desktop PC.


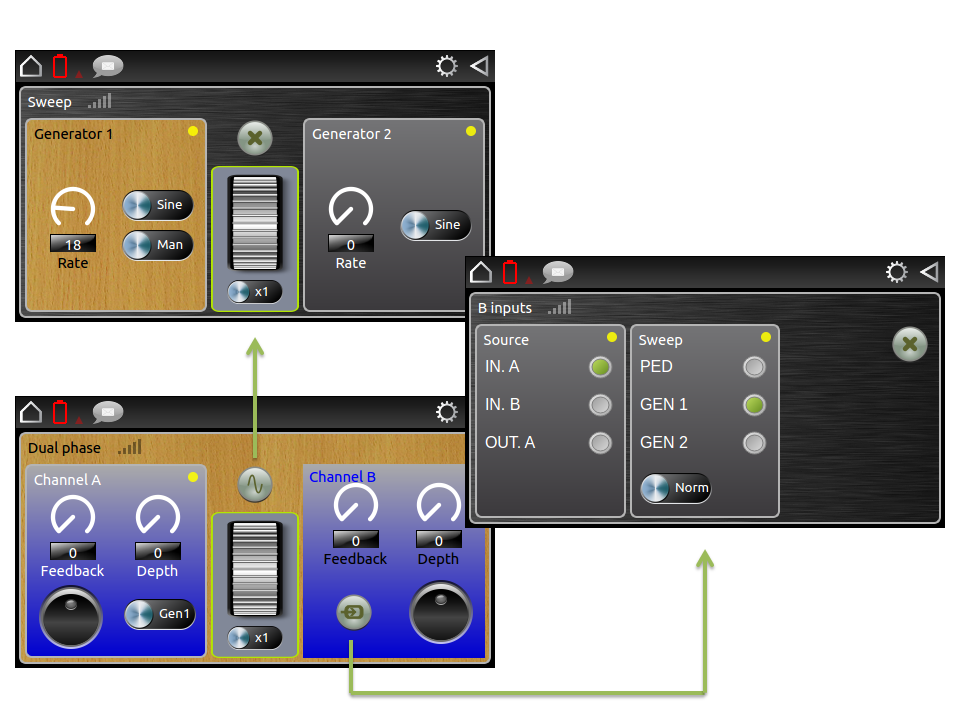
I don't know if you are familiar with Qt and how it builds GUIs (which is in some ways similar to the way it is done in Java SWING)? These systems use 3 main types of widgets: containers, controls and layout items. Our app on the phone is developed using Qt technology and our XML language (we call it Resource Markup Language or RML) describes the GUI in terms of arrangements of these kinds of widgets. I guess what I am trying to say (and doing it badly) is that using RML you can describe GUIs of any level of complexity.

Here are some examples:

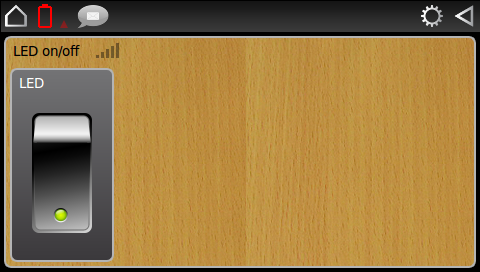
SIMPLE EXAMPLE (the hello world for a GUI i.e. LED on/of):


<screen name="main-page" margins="4">
    <devicebox title="$(NICKNAME)" layout="horizontal" spacing="4" margins="4" skin="wood">
        <xpcontrolbox bind="on" layout="horizontal" leftmargin="20" rightmargin="20" stretch="1">
            <localetitle><en>LED</en></localetitle>
            <xpsvgtoggleswitch bind="on" skin="Beryl"/>
        </xpcontrolbox>
        <spacer stretch="4"/>
    </devicebox>
</screen>


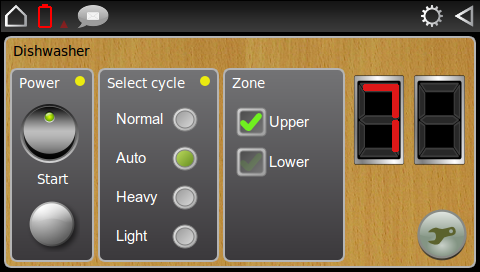
MEDIUM COMPLEXITY:


HIGH COMPLEXITY EXAMPLE (with style sheets and multi-screen):


Here is a current list of widgets by type:

Layout/container items

  • box
  • groupbox
  • devicebox
  • signalbox
  • controlbox
Layout/spacing items:
  • separator
  • spacer
Controls:
  • label
  • checkbox
  • pushbutton
  • svgbutton
  • svgtoggleswitch
  • svgslideswitch
  • slider
  • scrolldial
  • scrollwheel
  • scrolldialwheel
  • 5waybutton
  • 3waybutton
  • 2waybutton
  • rockerbutton
  • radiogroup
  • progress
  • led
  • 7seg
  • dialgauge
  • lineedit
  • listbox
The phone does not have to have NFC for the system to work, it just makes it easier and sexier when you can tap the phone to a device and interact with it. The system has a control Hub which has NFC on it and provides the 802.15.4 PAN networking, so you can also tap devices to the Hub to pair them with the system.

A while ago I was looking for a low cost robot that could be controlled using Arduino. I found the Zumo Robot and bought a couple of these. A few days ago I spent about 20 minutes creating the RML and Arduino code for controlling the Zumo and here is a short video of the result.


The shield interfaces any Arduino project into the ADRC ecosystem as shown in this diagram:


At this time the ADRC Shield is in alpha test phase. A second board iteration is due soon at which time the shield will progress to beta test.
Thursday 28 August 2014

Why ADRC?

The technology

Every technology that we have seen so far for remote control or for IoT has been based on device profiles, e.g. this is a TV or a temperature sensor.

This means that the end user cannot simply produce a completely novel device and have it work with other devices in the system without going back to some industry consortium and arguing that this device category should be added to the standard.

Even within a well defined category of device such as a TV every manufacturer wants to include some differentiating features. With existing systems this was usually catered for by having 'proprietary' fields within a standard profile.

The problem with this approach is that nobody but the manufacturer knows what these extra features are or how to use them.

ADRC takes a radically different approach. Each device describes itself in detail in such a way that a user interface can be rendered or a machine control scheme can be easily constructed.

The shield

One of our first products to market will be an Arduino shield which makes ADRC available to hobbyists (and other developers).

I have tried various wireless communication shields. Bluetooth, wifi etc. None that I have tried provide a complete end to end solution for either providing a user interface or machine to machine communication.

ADRC provides a method for describing a machine and its user interface. It also defines a protocol for 2 way synchronous and asynchronous communication.

Our library for arduino exposes all of this functionality to your code and handles all of the ADRC specific background work.
To use the library, you provide a description of the machine's inputs and outputs in an XML file and write handlers for the state changes in these I/Os.

Our hub enables your smartphone to talk to any number of ADRC shields as well as other products which are becoming available on xped.com and if your phone has NFC then pairing it with any ADRC device is a simple as tapping it to the xped logo.

The future


We have come up with many uses for ADRC which we hadn't even considered when we started and yet they have been easy to implement without modifying the core system.

We believe that ADRC can be used in many (most?) applications where communication with a machine is required and are actively seeking adopters who might be companies or individuals.

We believe that ADRC will herald the a new way of doing things: crowd design and manufacture. Where virtually anyone has the ability to innovate and create new things that can be manufactured and sold worldwide.

In the meantime we will continue to develop new products and applications, some of them pragmatic and some just for fun.

Keep watching this space for more.

Monday 25 August 2014

The ADRC System

Like other disruptive technologies that leapfrog the pack, ADRC might seem like magic. But I assure you it is not magic but is a well conceptualized system whose parts work together harmoniously to achieve a desirable outcome. ADRC has five main parts and these are:

  • The application
  • Device server
  • Device proxy
  • RCP
  • RML
There are other parts to the system that are introduced during implementation, but these five are the philosophical core of ADRC. 


From the above diagram, you can see how these five parts work together to form a system. Let's look at each part in turn to see what it does.

The Application

Simply put, the application is any entity that wants to interact with devices in the system. At this time the first true ADRC application is a generic client that we call the device browser. The easiest way to think of the device browser is like a kind of special web browser but specifically made to interact with any kind of device, appliance or in fact any entity that has an API. Just like a web browser, you can direct the device browser at a device and it will display its user interface but that is pretty much where the similarity ends. Web browsers are designed to manipulate text, graphics and multimedia content, however device browsers are designed to manipulate control transactions, handle unsolicited events, understand semantic data and provide interfaces for both humans and machines.

Device Server

Again relying on the web analogy, you can think of the device server as being similar to a web server in that it provides content for device browsers and other clients and may provide caching services. However that is where the similarity ends. The device server must deal with a dynamically changing system where devices can appear and disappear. Also devices can emit unsolicited signals that device browsers must be able to receive and interact with. In fact, the  display of a device browser must reflect the true state of a domain of devices as well as the true state of any device that is being browsed. Thus the device server is the heart of a distributed real-time control system; which as you might imagine, is a very difficult function to fulfill well.

Device Proxy

The device proxy has no web counterpart. Its function is to interface any arbitrary device to the rest of the ADRC system and to make this task easy. In networking speak, the correct terminology for the device proxy is a reverse proxy. It provides the native behaviors required by all ADRC complaint devices including:
  • enumeration of device structure and metadata
  • pairing and unpairing
  • security management
  • communications transport layer
  • file system
Because these core services are provided by the device proxy, the device application does not need to implement them. In fact a device only needs to respond to incoming RCP requests from applications and emit signals when its state changes.

Resource Control Protocol (RCP)

You can think of RCP as similar to HTTP, however it has different features that make it more suitable for controlling devices. It comes in two variants RCP.host and RCP.wire that can be mapped 1:1 to and from each other. The variant you use depends on where you are accessing the system from. RCP.host is used between the application and the device server. It uses an XML syntax to frame documents that form requests to the device server and to deliver responses and signals from the device server to the applications. RCP.wire is used between the device server and devices. It is self-framing, very compact and easy to parse, so it works well with low end microprocessors such as those used by the popular Arduino Uno. You can think of these two variants of RCP as being like XML and JSON. They can express the same data, but one is more light weight than the other.

Resource Markup Language (RML)

RML is an XML based language. You can think of it as being similar to HTML where HTML describes a webpage so that a web browser can draw it on screen, whereas RML describes a device so that a device browser or other ADRC client can control and monitor it and understand the meaning of its data. RML and the device browser implement the Model View Controller (MVC) design pattern. MVC is a powerful paradigm for separating data processing logic, display processing logic and control logic. One of the most interesting things about RML is that it is stored in the device itself, well actually in the file system provided by the device proxy. Because of this, it is possible for applications and devices to interact without connection to the Internet or even a WAN or LAN. RML is of central importance and is used at all layers of the ADRC system including the by the device server.

Now that you have an overview of the core elements that make up the ADRC system, we will look at each one in detail in my next few blogs, beginning with RML.

Until next time... have fun!

Chris Wood
CTO and co-founder

Monday 18 August 2014

WHAT IS ADRC?

Before I answer this question it is probably best if you watch this short video first...


In a nutshell, ADRC technology allows a controller to be tapped on a device, causing a graphical user interface for the device to appear on the screen. Thus enabling the user to instantly interact with the device. Imagine if every device in the world was made this way! We would all be able to interact with the things around us to get information, control and do all sorts of things that we can scarcely imagine at the moment.

This is the future that ADRC can deliver. Imagine you are walking down the street and you see a snack food vending machine.Mmmm, the candy looks good but you don't have the right change. In fact it seems like you never have the right change! Well if the vending machine was ADRC enabled, you would simply tap your smartphone on the touch point logo on the machine:

ADRC touch point logo

and the control panel for the vending machine would appear on your phone. Then select the candy that you want, the machine displays the price on your phone and you pay for it using PayWave or PayPass by tapping your phone again and the candy is yours!

I don't know about you but I never seem to have the change for a parking meter or if it takes credit card, it is out of service. So why not put ADRC technology in all the parking meters? Just tap your phone on the meter, select the parking time you want, the machine calculates the charge and displays it on your phone. You pay by PayWave or PayPass by tapping your phone on the meter again to confirm.

Hey I bet you're getting some ideas of your own by now.

One reason that ADRC is so different from all the other solutions out there right now is that you only need one app to handle every device. That's right only one app! Which really is the breakthrough here.You don't need an app for the vending machine, well in fact for every different vendor of vending machine and you don't need an app for the parking meter, in fact every different vendor of parking meter. Everybody that has a smartphone knows the problem of app overload; it is a daily nuisance. ADRC eliminates this in just the same way as the web browser did for the WWW. That is, ADRC delivers device browser technology and a markup language to make the interaction between controllers and the devices totally generic. But more on this in later posts.

We at Xped have already got the ball rolling by making some really useful devices that already have this amazing technology built in. Our IR Blaster will allow you to get rid of all your infrared remote controls forever and control your AV and AC from your phone. Our Ultra Plug allows you to control simple appliances like lamps, fans, heaters right from your phone and even see how much power they are using and their historical energy usage. Our Vari Plug is similar to Ultra Plug but allows you to dim a lamp or change the speed of an electric motor. These are just the first of many products on our road map.You can visit our website www.xped.com to get more information on these

For those of you that are hobbyists and Arduino fans, we have created the ADRC Shield. Just add one of these to your next Arduino project and you will be able to control it from your phone in minutes.Just like in the video.


Well that's it for now. I hope you think ADRC is as wonderful as we do. Stay tuned for my next installment that explains the main parts that make up the ADRC system

Until next time... have fun!

Chris Wood
CTO and co-founder